
5. Features A-Z
Access codes
These help protect against unauthorized use of your
phone and SIM card:
•
security code (see page 72
)
•
PIN and PIN2 codes (see page 64)
•
system password (see page 77)
•
module code (for optional analog module; see page 87
)
Access codes consist of numbers. If the phone asks
you for one of these codes, key in the requested code
and press
2.. If you make a mistake, press &OHDU to
erase, then enter the correct digit.
To change access codes:
1) Press
0HQX 4 2 7 (6HWWLQJV - 6HFXULW\#VHWWLQJV - $FFHVV#
FRGHV)
(For details on how to work the Menu, see page 13)
2) Press
W
to scroll through the codes you wish to
change, and press
6HOHFW
3) The phone prompts you for the existing code, the
new code, and verification of the new code. At
each prompt, enter the information and press
2..
Note: You can’t change the PIN code unless SIM card security
(see page 76) is on.
Note: Avoid using access codes that are similar to emergency
numbers, such as 911, to prevent accidental dialing of the
emergency number.
Alarm clock
The alarm clock feature is based
on your phone’s internal clock and
sounds an alert at a time you spec-
ify. See “Clock” on page 37 for
information on your phone’s clock.

19
Setting the alarm clock
1) Press
0HQX 4 3 4 (6HWWLQJV - 3KRQH#VHWWLQJV - $ODUP#
FORFN)
(For details on how to work the Menu, see page 13)
2) Enter the alarm time, using two digits for both
hours and minutes
3) Press
2.
4) Select either
DP or SP and press 2.
Note: Step 4 is necessary only if you have selected am/pm
format; see “Selecting time format” on page 37 for more
information.
Turning the alarm clock off
1) Press
0HQX 4 3 4 (6HWWLQJV - 3KRQH#VHWWLQJV - $ODUP#
FORFN)
(For details on how to work the Menu, see page 13)
2) Press
W
to
2II and press 2.
When the alarm sounds
Press
6WRS to shut off the alarm
OR
Press
6QRR]H and the alarm will sound again in 5
minutes.
If you let the alarm sound for 1 minute without pressing
a key, it stops for 5 minutes, then starts again.
If you turn off the phone
If you turn off the phone and the alarm is set, the
phone switches itself on at alarm time, then the alarm
sounds. If you press
6WRS, the phone displays .HHS#WKH#
SKRQH#RQ". Press <HV to keep it on or 1R to switch it off.
REMEMBER! Do not switch on the phone when wire-
less phone use is prohibited or when it may cause
interference or danger.
All calls timers
See “Call timers” on page 30.

20
Analog module
See "Optional Analog Module" on page 84.
Analog system selection
See “Analog system selection” on page 85.
Automatic answer
This is one of the settings in your phone’s profiles (see
page 65). With this on, your phone answers incoming
voice calls after one ring.
Note: (1) This is available only when your phone is connected
to a headset or to an approved handsfree car kit equipped
with the ignition sense option, with the ignition on. (2) Auto-
matic answer does not function if the ringing option is set to
6LOHQW
,
%HHS#RQFH
, or
&DOOHU#JURXSV
.
Activating automatic answer
1) Press
0HQX#3 (3URILOHV)
(For details on how to work the Menu, see page 13)
2) Use
ýW
to select
&DU or +HDGVHW, then press 2SWLRQV
3) Choose
&XVWRPL]H and press 2.. Press
W
to reach
$XWRPDWLF#$QVZHU and press 6HOHFW.
4) Press
W
to reach
2Q (or 2II#to deactivate it)
Note: This feature will not function with data calls.
Automatic redial
When this feature is turned on, your phone will redial
the number you’re trying to call up to 10 times. Press
ô
to stop the call attempts.
Automatic redial will not redial a busy number while you initiate
or answer another call.
Activating automatic redial
1) Press
0HQX 4 1 1 (6HWWLQJV - &DOO#VHWWLQJV - $XWRPDWLF#
UHGLDO)
(For details on how to work the Menu, see page 13)
2) Press
W
or
V
to
2Q and press 2.

21
Business cards
Your phone can send or receive electronic business
cards consisting of a name and phone number. You
can save received business cards to your phone book.
For details on the phone book, see "Phone book" on
page 61.
Sending business cards
1) Recall the name from your phone book
2) Press
'HWDLOV, if shown, or skip to Step 3
3) Press
2SWLRQV
4) Press
W
or
V
to reach
6HQG#EXV1#FDUG
5) Press
6HOHFW
6) Enter or recall the destination phone number
7) Press
2.
Viewing received business cards
When you receive a business card, the phone displays
%XVLQHVV#FDUG#UHFHLYHG#and sounds an alert (depending
on the “Message alert tone”; see page 54).
Caution: If you press
([LW
at any time before saving the busi-
ness card, the business card will be deleted!
1) When your phone displays
%XVLQHVV#FDUG#UHFHLYHG,
press
2SWLRQV
2)
6KRZ is selected. Press 2.
3) Scroll through the available information
Saving viewed business cards
1) After viewing the business card, press
%DFN, scroll
to
6DYH, then press 2.
2) At the
1DPH= prompt, edit the name if desired,
then press
2.
3) At the
1XPEHU= prompt, edit the number if desired,
then press
2.
22
Deleting viewed business cards
After viewing the business card, press
%DFN, then press
([LW.
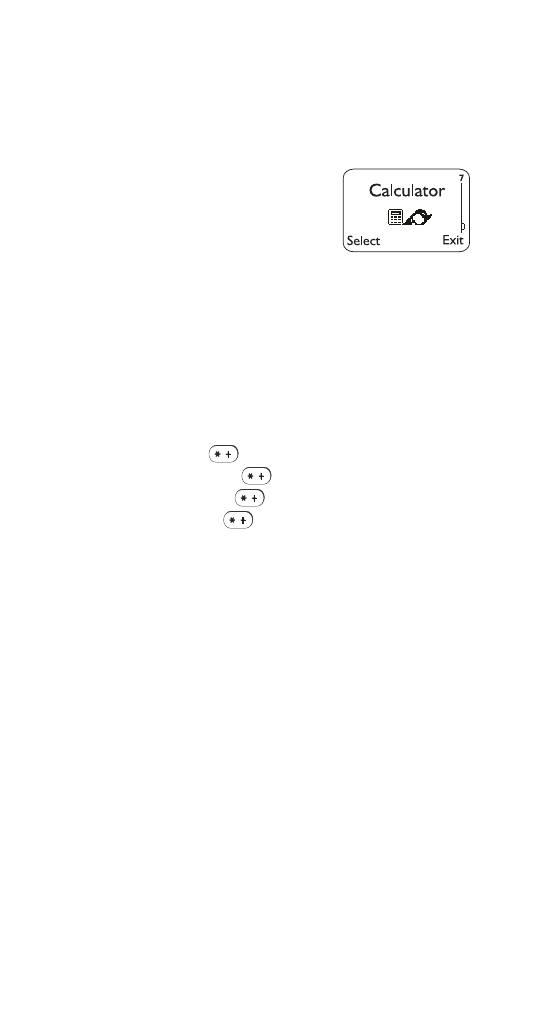
Calculator
Your phone’s calculator adds, sub-
tracts, multiplies, divides, and
converts between currencies.
REMEMBER! Your phone must be
switched on to use this function. Do not
switch on the phone when wireless phone use is prohibited or
when it may cause interference or danger.
Using the calculator
1) Press
0HQX 7 (&DOFXODWRU)
(For details on how to work the Menu, see page 13)
2) Enter the first number in the calculation
3) To add, press
once (
+
appears)
To subtract, press
twice (
ýð appears)
To multiply, press
three times (
∗
appears)
To divide, press
four times ( / appears)
4) Enter the second number
Repeat steps 3 and 4 as many times as needed.
5) Press
2SWLRQV. (TXDOV is selected. Press 2.
Note: When you are entering numbers, press
&OHDU
to erase
any mistakes.
Note: You can also choose
$GG
,
6XEWUDFW
,
0XOWLSO\
, and
'LYLGH
from the list of options.
Decimals
Press the # key once to enter a decimal point.
Currency conversion
Before you can begin converting currencies, you need
to set the exchange rate.
1) Press
0HQX 7, then press 2SWLRQV

23
2) Scroll to
([FKDQJH#UDWH, then press 2.
3) Scroll to
+RZ#PDQ\#KRPH#XQLWV#WR#D YLVLWHG#XQLW (to
enter the number of domestic units to a foreign
unit) or
+RZ#PDQ\#YLVLWHG#XQLWV#WR#D#KRPH#XQLW (to
enter the number of foreign units to a domestic
unit)
4) Press
2.
5) Enter the exchange rate (press # to enter a
decimal point)
6) Press
2.
Now you can do a conversion:
1) Enter the amount to be converted
2) Press
2SWLRQV
3) Scroll to
7R#KRPH to convert to domestic units or
7R#YLVLWHG to convert to foreign units
4) Press
2.
Calendar
The calendar keeps track of
reminders, calls you need to make,
meetings, and birthdays. It can
even sound an alarm when it’s time
for you to make a call or go to a
meeting.
REMEMBER! Your phone must be switched on to use this
function. Do not switch on the phone when wireless phone
use is prohibited or when it may cause interference or danger.
Using the calendar
1) Press
0HQX 8 (&DOHQGDU)
(For details on how to work the Menu, see
page 13)
If you haven’t set the time and date, your phone
prompts you to
6HW#SKRQH#FORFN. If you have already
set the time and date, go to Step 2.

24
When your phone prompts you for the time with
KK=PP, enter the time in hours and minutes (using
two digits for each), then press
2.
Press
W
or
V
to reach
DP or SP, then press 2.
You can set the time format to either 24-hour or
am/pm using the Clock. See “Selecting time for-
mat” on page 37.
When your phone prompts you for the date with
PP2GG2\\\\, enter the month and day (using two
digits for each) and year (using four digits), then
press
2..
Tip:
Use
W
to move the cursor right and
V
to
move it left. When you enter a digit, it writes over
the number to the right of the cursor.
2) Your phone displays the current date and gives
you two choices:
2SWLRQV and %DFN
About the date display
The phone automatically displays today’s date. To
scroll to a different date, press
W
or
V
. To skip directly
to a different date, see “Option 5: Go to date” on
page 26.
If you have set any calendar notes for the displayed
date, the appropriate icon(s) appear in the lower right-
hand corner:
Once you’re at the date you want, press
2SWLRQV. Then
use
Wý
to select the option you want, and press
6HOHFW.
The options are:
Option 1: View day
This option allows you to view, erase, edit, move, and
send notes that were made for the selected day.
Birthday reminder
Meeting reminder
Call reminder
Other reminder

25
Press
W
or
V
to scroll through notes. Options while
viewing a note are
(UDVH, (GLW, 0RYH (to another date),
and
6HQG#QRWH (to send the note).
Option 2: Make note
With this option, you’ll need to choose
5HPLQGHU, &DOO,
0HHWLQJ, or %LUWKGD\. Your phone will prompt you for
more information depending on which one you
choose.
See “Entering letters and numbers” on page 42 for
help with entering information at the
6XEMHFW= prompt.
You can set an alarm for any of the note types.
Your phone must be turned on in order for the alarm to
sound. If you set an alarm, when the alarm sounds,
you can choose
2. or 3RVWSRQH. Pressing 2. stops
the alarm; pressing
3RVWSRQH#resets the alarm for
10 minutes later.
Option 3: Erase notes
Press
W
or
V
to reach
2I#FKRVHQ#GD\, 2QH#E\#RQH, or $OO#
DW#RQFH, then press 2..
2I#FKRVHQ#GD\ displays each note for the day you selected
before pressing
2SWLRQV, so you can delete them
individually. Press
(UDVH to delete the note, or press
W
or
V
to leave it and view other notes.
2QH#E\#RQH displays notes in chronological order,
birthdays first, so you can delete them individually.
Press
(UDVH to delete the note, or press
W
or
V
to leave
it and view other notes.
$OO#DW#RQFH allows you to delete all calendar notes at
once. The phone asks you to confirm your decision
before erasing the notes.
Option 4: View all
This option allows you to scroll through birthday notes
in chronological order, then other notes in chronolo-
gical order.

26
Option 5: Go to date
This option allows you to go directly to the specified
date instead of scrolling. Enter a date in
PPGG\\\\
format, then press
2. to go to that date.
Option 6: Set the date
This option allows you to set today’s date in your
phone. Enter the date in
PPGG\\\\ format, then press
2..
Calendar note received
Your phone displays
&DOHQGDU#QRWH#UHFHLYHG when
someone sends you a note that you can save in your
calendar. Saving a note in your calendar is equivalent
to making the note yourself; you can work with it in the
same way as any other note in your calendar, including
setting an alarm.
For information on sending calendar notes, see
page 24.
Viewing received calendar notes
Caution: If you press
([LW the calendar note will be
deleted!
1) When your phone displays
&DOHQGDU#QRWH#UHFHLYHG,
press
2SWLRQV
2)
6KRZ is selected. Press 2.
3) Press
W
to scroll through the note
Saving received calendar notes
1) After viewing the calendar note, press
%DFN
2) Scroll to
6DYH, then press 2.
Discarding viewed calendar notes
After viewing the calendar note, press
%DFN, then press
%DFN#again.

27
Call cost limit
This feature allows you to limit the amount of money
you spend on your mobile phone bills. When the limit
you set is reached, no calls can be made except for
emergency calls.
Note: The actual time invoiced for calls by your service provi-
der may vary, depending on network features, rounding-off for
billing, and so forth.
See also “Show call costs” on page 75. To choose
whether you want call cost measured in charging units
or dollars, see “Show costs in” on page 75.
Setting a call cost limit
1) Press
#0HQX 4 2 6 (6HWWLQJV#0#6HFXULW\#VHWWLQJV#0#&DOO#
FRVW#OLPLW)
For details on how to work the menu, see page 13.
2) The phone asks for your PIN2 code (see
page 64). Enter it and press
2..
3) Use
W
to reach
6HOHFW then press 2.
4) When you see
1XPEHU#RI#XQLWV= enter the number
of charging units or dollars (press # to insert a
decimal point) and press
2.
The number of remaining units is shown when the dis-
play is clear.
Removing a call cost limit
1) Follow steps 1 and 2 in “Setting a call cost limit”
2) Use
W
to reach
2II then press 2.
Call forwarding
See “Forward calls” on page 45.
Call hold
You can put a single call on hold. If you subscribe to
the Call Waiting network service, you can also put one
call on hold when you receive another call.

28
Putting a call on hold
While in a call, press
+ROG. Press 8QKROG to return to the
call.
Making a call with one already in progress
While in a call, enter (or recall from the phone book) the
second phone number and press
ó
.
OR
1) Press
2SWLRQV
2) Use
W
to reach
1HZ#FDOO#and press 6HOHFW.
3) Enter (or recall from the phone book) the second
phone number, and press
&DOO
With either method, the first call is automatically put on
hold.
The currently active call is indicated by the
icon and
the held call by the
icon.
Switching between two calls in progress
Press
ó
OR
Press
6ZDS
Ending the active call
Press
ô
(the held call becomes active).
Ending both calls
1) Press
2SWLRQV
2) Use
W
to reach
(QG#DOO#FDOOV#and press 6HOHFW.
Call log
This feature automatically keeps
track of numbers you’ve dialed,
numbers that have called you, and
the amount of time you’ve spent
on calls.

29
Using call log
1) Press
0HQX 2 (&DOO#ORJ)
(For details on how to work the Menu, see page 13)
2) Press
ý
W
to reach one of the following options,
then press
6HOHFW
2-1
#0LVVHG#FDOOV - See page 56.
2-2
#5HFHLYHG#FDOOV - See page 67.
2-3
'LDOHG#FDOOV#- See page 39.
2-4
#&OHDU#FDOO#OLVWV - See page 36.
2-5
&DOO#WLPHUV#- See page 30.
2-6
6KRZ#FDOO#FRVWV - See page 75.
2-7
6KRZ#FRVW#LQ - See page 75.
Tip:
You can dial any of the phone numbers by pres-
sing
ó
while the number is on the display.
The ‘Options’ soft key
When you access
'LDOHG#FDOOV, 0LVVHG#FDOOV, or 5HFHLYHG#
FDOOV and press 2SWLRQV, a list of options will appear on
your phone’s display.
&DOO#WLPH shows the date and time of the last call. Press
the scroll button to scroll through up to five recent call
dates/times for this phone number.
(GLW#QXPEHU allows you to edit the dialed number and
save it with a name to your phone book.
6DYH allows you to enter a name for the number and
save both to your phone book.
(UDVH erases the number from the call list.
9LHZ#QXPEHU displays the phone number if the asso-
ciated name is currently displayed.
Call settings
This feature consists of automatic redial, call waiting,
send own number, line in use, and calling card.
See the individual entries for each of these features.

30
Call timers
The phone automatically tracks
the amount of time you’ve spent in
the last call and in all digital calls.
If you have subscribed to a second
phone line (see “Line in use” on
page 53), call timers are separate for each of your
phone lines. When you view call timers, the call timers
that are shown are for the currently selected outgoing
line. However, if you view call timers while you are in a
call, the call timers that are shown are for the line you
are using at that moment.
For information on call timers for analog calls, see “Call
timers for analog calls” on page 86.
Viewing duration of last call or all digital calls
1) Press
0HQX 2 5 (&DOO#ORJ - &DOO#WLPHUV)
(For details on how to work the Menu, see page 13)
2) Press
ý
W
ýto view /DVW#FDOO GXUDWLRQ or 'LJLWDO#FDOOV#
GXUDWLRQ
Setting timers back to 0
1) Press
0HQX 2 5 (&DOO#ORJ - &DOO#WLPHUV)
2) Press
ý
W
ýto reach &OHDU#GLJLWDO#FDOO#WLPHUV, then
press
2.
3) Enter your security code, then press
2. again
Showing the current call timer during calls
1) Press
0HQX 2 5 (&DOO#ORJ - &DOO#WLPHUV)
2) Press
W
ýto reach /DVW#FDOO#GXUDWLRQ, then press 'HWDLOV
3)
&XUUHQW#FDOO is displayed; press 6HOHFW
4) Press
W
to reach
2Q, then press 2.
During a call, the amount of time spent in that call will
be displayed.
Note: The actual time invoiced for calls by your service provider
may vary, depending upon network features, rounding-off for
billing, and so forth.

31
Call waiting
This is a network service that allows you to receive an
incoming call when you’re already in a call. The phone
beeps to let you know of the incoming call. Contact
your service provider for details.
If you have subscribed to a second phone line (see
page 53), call waiting settings affect both phone lines
at the same time; for example, you cannot cancel call
waiting on one line and not the other.
Activating or cancelling call waiting
1) Press
0HQX 4 1 2 (6HWWLQJV - &DOO#VHWWLQJV - &DOO#ZDLWLQJ)
(For details on how to work the Menu, see page 13)
2) Press
ý
W
ýto highlight $FWLYDWH/ &DQFHO/#or#6WDWXV
3) Press
2.
Using call waiting
Press
ó
or
$QVZHU to answer a waiting call. The call
you were on is put on hold.
To reject the call, press
2SWLRQV, press
W
to reach
5HMHFW, and press 6HOHFW.
Note: If you don’t want to answer the call, you can also just let
it ring.
To switch between the two calls, press
ó
or
6ZDS.
To end the active call, press
2SWLRQV, scroll to 'URS#FDOO,
then press
6HOHFW. The held call becomes active.
Third call waiting
If you have both an active and a held call and a third call
is waiting, press 1
ó
. This drops the active call and
answers the waiting call; the held call is unaffected.
Or, you can press
2SWLRQV and scroll to (QG#DOO#FDOOV. This
ends both the active and the held call, and the waiting
call is handled as a normal incoming call.

32
Caller groups
You can create groups of names in your
3KRQH#ERRN
(see page 61), and give each group a different ringing
tone. Then you’ll know when someone from that
group is calling you because of the way the phone
rings.
Adding names to a caller group
Note: The names and numbers that you add to a group must
already be stored in your Phone book. See “Saving names and
numbers” on page 72.
1) With the display clear, press
W
until you see the
name or number you want
2) Press
'HWDLOV, if shown, or skip to Step 3
3) Press
2SWLRQV
4) Use
W
to reach
&DOOHU#JURXSV. Press 6HOHFW.
5) Use
W
to reach the group to which you want to
add this name or number. Press
6HOHFW.
Removing names from a caller group
1) Follow steps 1-4 in “Adding names to a caller
group”
2) Use
W
to reach
1R#JURXS. Press 6HOHFW.
Defining a ringing tone for a caller group
1) With the display clear, press
1DPHV
2) Press
W
to reach
&DOOHU#JURXSV. Press 6HOHFW
3) Use
W
to reach the group you want. Press
6HOHFW
4) Press
W
until you see
5LQJLQJ#WRQH. Press 6HOHFW.
Use
W
to reach the tone you want to hear when
anyone from this group calls you. Press
2..
Tip
:
You can set your phone to ring only when people
from certain caller groups call you, and to otherwise be
silent. See the “Caller group” description under “Ring-
ing options” on page 69.

33
Renaming a caller group
1) Follow steps 1-3 in “Defining a ringing tone for a
caller group”
2) Press
W
until you see
5HQDPH#JURXS. Press 6HOHFW.
3) Enter the group name (see “Entering letters and
numbers” on page 42 for details) and press
2.
Group graphics
Each caller group has a graphic (picture) associated
with it. When you get a call from someone whom you
have assigned to a caller group, the graphic associ-
ated with that group will flash on the screen.
To turn the graphic off for a particular caller group,
press
1DPHV, scroll to &DOOHU#JURXSV, and press 6HOHFW.
Scroll to the name of the group and press
6HOHFW. Scroll
to
*URXS#JUDSKLF and press 6HOHFW. Scroll to 2II and
press
6HOHFW.
To turn the graphic on, follow the steps above, but
scroll to
2Q in the last step.
To view the graphic that is associated with a caller
group, follow the steps above, but scroll to
9LHZ#JUDSKLF
in the last step. The graphic will flash; this is normal.
To send the graphic to someone else, follow the steps
above, but scroll to
6HQG#JUDSKLF in the last step. Enter
the phone number or scroll to find it in your phone
book, then press
2..
If you receive a graphic from someone else, press
2SWLRQV and then choose 6KRZ to see the graphic, 6DYH
to save it (you will be asked to choose which caller
group the graphic should be assigned to), or
'LVFDUG to
discard it.
Caller ID
Caller ID is a network service that displays the phone
number of the person calling you, if it is available.
Check with your service provider for details.

34
If the caller can be identified, the caller's phone num-
ber (or name, if stored in the phone book) and the text
FDOOLQJ appears while the phone is ringing. If the name
is too long to be displayed, its end is replaced with an
ellipsis (...). If the caller cannot be identified, only
&DOO is
displayed.
If you subscribe to the Call Forwarding network
service and the incoming call has been forwarded from
another phone number, the
! sign is shown after
FDOOLQJ.
Calling card
If you wish to use a calling card for
long distance calls, you must first
store your calling card information
into your phone. Your phone can
store two calling cards.
Programming a calling card
1) Press
0HQX 4 1 5 (6HWWLQJV - &DOO#VHWWLQJV - &DOOLQJ#
FDUG)
(For details on how to work the Menu, see
page 13)
2) Press
W
or
V
to reach desired calling card, then
press
2SWLRQV
3) Press
W
or
V
to reach
(GLW, then press 2.
4) Enter security code and press
2.
5) At
'LDOLQJ#VHTXHQFH, press 6HOHFW. Press
W
or
V
to
choose the dialing sequence your card uses (see
chart on page 35), then press
6HOHFW.
Note: The order of the following steps may vary, depending on
which dialing sequence your card uses.
6) Enter access number (usually the 1-800 number
listed on the back of the calling card), press
2.
7) Enter card number and/or PIN, press
2.. Your
phone will display
6DYH#FKDQJHV". Press 2..

35
8) Press
W
or
V
to reach
&DUG#QDPH= and press 6HOHFW.
Enter card name using your phone’s keypad,
press
2..
(See “Entering letters and numbers” on page 42 if
you need help on entering the card name.)
For details about your phone’s security code, see
“Security code” on page 72.
Choosing a calling card to use
1) Press
0HQX 4 1 5 (6HWWLQJV - &DOO#VHWWLQJV - &DOOLQJ#
FDUG)
(For details on how to work the Menu, see page 13)
2) Press
W
or
V
to reach desired card, press
2SWLRQV
3)
6HOHFW is highlighted; press 2.
4) Enter security code at
6HFXULW\#FRGH=, press 2.
Making calling card calls
1) Enter the phone number, including any prefix (such
as 0 or 1) that your calling card may require when
you make a calling card call. See your calling card
for instructions.
Dialing
Sequence
Use for cards that
require you to:
Cards using
this
sequence
Access no.
+ Phone no.
+ card no.
Dial 1-800 access number,
then phone number, then card
number (+ PIN if required)
MCI, AT&T True
Choice, Sprint
Canada, Unitel
Access no.
+ card no.
+ phone no.
Dial 1-800 access number,
then card number (+ PIN if
required), then phone number
networkMCI,
WorldPhone MCI
Prefix
+ phone no.
+ card no.
Dial the prefix (any numbers
that must precede the phone
number) and phone number
you want to dial, then card
number (then PIN, if required)
GTE, PacBell,
AT&T, Stentor

36
2) Press and hold
ó
for a few seconds until your
phone displays
&DUG#FDOO
3) Your phone will display
:DLW#IRU#WRQH/#WKHQ#SUHVV#2..
Wait for the tone, then press
2..
4) Your phone will display
:DLW#IRU#WRQH/#SUHVV#2.#
DJDLQ. Wait for the tone, then press 2..
Note: Steps 3 and 4 may be switched depending on the
dialing sequence you chose.
This procedure may not work with all calling cards. Please look
at the back of your calling card or contact your long distance
company for more information.
Change access codes
See “Access codes” on page 18.
Change module code
See “Change module code” on page 87.
Clear call lists
This feature will clear all dialed numbers, as well as
numbers of answered calls and missed calls. You
cannot undo this operation, so be careful.
Also, see “Call log” on page 28.
1) Press
0HQX 2 4 (&DOO#ORJ - &OHDU#FDOO#OLVWV)
(For details on how to work the Menu, see page 13)
2) Highlight either
$OO, 0LVVHG, 'LDOHG, or 5HFHLYHG and
press
2. ($OO will clear all call lists, while the others
clear their respective call lists)
Note: Missed, Received, and Dialed calls lists are also erased
when you use a SIM card that is not one of the 5 most previ-
ous cards used with the phone, or you change the phone
security setting. See “Phone security” on page 63.
Clear timers
See “Call timers” on page 30.

37
Clock
Your phone has an internal clock
that can be displayed on the start
screen. It also features an alarm
clock (see page 18).
Setting the clock
1) Press
0HQX 4 3 3 (6HWWLQJV - 3KRQH#VHWWLQJV - &ORFN)
(For details on how to work the Menu, see page 13)
2) Press
W
to
$GMXVW#WLPH, press 6HOHFW
3) Enter the current time, using two digits for both
hours and minutes
4) Press
2.
5) Select
DP or SP and press 2. (if am/pm time
format has been selected; see below)
If this is the first time you have set the clock, the phone
will prompt you to enter the date. Enter the date in
PPGG\\\\ format and press 2..
Selecting time format
1) Press
0HQX 4 3 3 (6HWWLQJV - 3KRQH#VHWWLQJV - &ORFN)
(For details on how to work the Menu, see page 13)
2) Press
W
to
7LPH#IRUPDW and press 6HOHFW
3) Press
W
to either
570KRXU or DP2SP
4) Press
2.
Displaying or hiding the clock
This feature allows you to toggle between displaying
the clock on the start screen or hiding it.
1) Press
0HQX 4 3 3 (6HWWLQJV - 3KRQH#VHWWLQJV - &ORFN)
(For details on how to work the Menu, see page 13)
2) Press
W
to either
+LGH#FORFN or 'LVSOD\#FORFN (only one
choice appears, depending on the current setting)
3) Press
6HOHFW

38
Conference calls
This is a network service that allows you to make con-
ference calls with your phone. Check with your service
provider for details.
First, call the first person
Make a call as usual.
Then, call other participants
Either of the following methods automatically puts the
existing call on hold as you make the new call:
1) While in a call, enter the phone number of the
person you want to conference in, and press
ó
OR
Press
2SWLRQV, press
Wý
to
1HZ#FDOO, then press
6HOHFW. Enter or recall the phone number from the
phone book, then press
&DOO#or
ó
2) After the second party answers, press
2SWLRQV
3) Press
W
to
&RQIHUHQFH and press 6HOHFW
4) To add other people to the call, repeat steps 1-3
5) To end the conference call, press
ô
Having a private conversation with one of the
participants
1) While in the call, press
2SWLRQV
2) Press
W
to
3ULYDWH and press 6HOHFW. A list of the
participants appears.
3) Scroll to the desired person and press
2.. The
other participants can continue to talk to each
other.
4) To re-join the conference call, press
2SWLRQV
5) Press
W
to
&RQIHUHQFH and press 6HOHFW

39
Dropping individual participants from the
conference call
1) While in a conference call, press
2SWLRQV
2) Press
W
to
3ULYDWH and press 6HOHFW. A list of the
participants appears.
3) Scroll to the desired person and press
2.. The
other participants can continue to talk to each
other.
4) Press
2SWLRQV
5) Press
W
to
'URS FDOO and press 6HOHFW
Currency conversion
See “Currency conversion” on page 22.
Current call duration
See “Call timers” on page 30.
Data calls
See “Fax and data calls” on page 44.
Dialed calls
Your phone automatically stores
the last 10 numbers you’ve dialed.
See “Call log” on page 28 for
details on other call lists.
Viewing the dialed calls list
1) Press
0HQX 2 3 (&DOO#ORJ - 'LDOHG#FDOOV)
2) Press
W
or
V
to reach the desired number
3) To dial the number, press
ó
; for other options,
press
2SWLRQV (see “The ‘Options’ soft key” on
page 29)
Erasing the dialed calls list
See “Clear call lists” on page 36.

40
Dice
See "Games" on page 47.
Digital/analog selection
See “Digital/analog selection” on page 87.
Distinct ringing
This allows you to set the phone to ring in a special
way when certain people call you. See “Caller group-
ing” on page 33.
Earpiece volume
The volume buttons on the side of
your
phone allow
you to adjust the earpiece volume during a phone call.
Pressing the top button increases the volume and
pressing the bottom button decreases the volume.
If an accessory with its own loudspeaker is connected
to your phone, the volume buttons will adjust the
volume for that accessory.
Emergency calls
Before attempting any emergency calls, see “Emergency
Calls” on page 99 for important safety information.
1) If the phone is not on, switch it on. Some networks
may require that a valid SIM card is properly
inserted in the phone.
2) Press the
ô
key to ready the phone for calls.
(Press it twice if there are still digits on the display.)
3) Key in the emergency number for your present
location (e.g. 911 or other official emergency
number). Emergency numbers vary by location.
4) Press
ó
IMPORTANT!
This phone, like any wireless phone, operates using radio
signals, wireless and landline networks as well as user-pro-
grammed functions which cannot guarantee connection in all
conditions. Therefore you should never rely solely upon any
wireless phone for essential communications (e.g. medical
emergencies).

41
Remember, to make or receive any calls the phone must be
switched on and in a service area with adequate signal
strength. Emergency calls may not be possible on all wireless
phone networks or when certain network services and/or
phone features are in use. Check with local service providers.
If certain features are in use (Keyguard, fixed dialing, restrict
calls, etc.), you may first need to turn those features off before
you can make an emergency call. Consult this document and
your local cellular service provider.
When making an emergency call, remember to give all the
necessary information as accurately as possible. Remember
that your wireless phone may be the only means of communi-
cation at the scene of an accident - do not cut off the call until
given permission to do so.
Emergency Key 9
With this feature on, the phone attempts to make an
emergency call when you press 9 then
ó
. The
phone dials the emergency number programmed into
your phone.
Note: This feature is not active until you follow the steps in
“Turning on the Emergency Key 9 feature”.
Note: You can also dial an emergency call by pressing and
holding 9 until the phone indicates it is attempting to make an
emergency call. However, this method does not work when
Keyguard is active or when the phone is connected to a
modem.
Turning on the Emergency Key 9 feature
1) Press
0HQX 4 3 8 (6HWWLQJV - 3KRQH#VHWWLQJV -#
(PHUJHQF\#NH\#<)
(For details on how to work the Menu, see page 13)
2) Press
W
to reach
2Q or 2II, then press 2.
IMPORTANT!
Official emergency numbers vary by location (for example,
911). You can only program one emergency number into your
phone to be dialed automatically by Emergency Key 9, and it
might not be the proper number in all circumstances.

42
Entering letters and numbers
You can enter letters as well as numbers when storing
information into your phone. Simply press the corre-
sponding number key repeatedly until the desired
letter appears on the display (for example, use the 2
key to enter A, B, or C).
ABC mode
When your phone prompts you to enter letters, it will
automatically switch over to ABC mode.
Your phone displays the ABC icon to indicate that it is
in ABC mode.
When ABC is displayed, you can enter these characters:
While you’re editing a name, the
V
key will move the
cursor to the left, and
W
will move it to the right.
Press
&OHDU to correct any mistakes.
If you wish to enter an empty space between
characters, press 0 for each space.
Changing letter case
Press the # key to switch between upper- and lower-
case letters. The
$%& icon will switch to DEF to indicate
you are using lower case.
Entering numbers
To enter numbers while in ABC mode, you can:
• press and hold the corresponding key until the number
appears, or
Key
Characters
Key
Characters
1
.,?!-1
7
PQRS7
2
ABC2
8
TUV8
3
DEF3
9
WXYZ9
4
GHI4
0
space, 0
5
JKL5
∗
(See page 43 for
details.)
6
MNO6
#
Changes letter case

43
• switch between ABC mode and number mode by pressing
and holding the # key.
Special characters (for storing names)
When you are in ABC mode (see page 42) you can
press the
key and the following special characters
will appear. If your SIM card supports special charac-
ters, you can use these characters when storing
names in your phone book. Simply press
W
or
V
to
highlight the one you wish to use, then press
,QVHUW.
. , ? ! : ; - + #
∗
( ) ‘ “ _ @ & $ £ % / < > ¿ ¡ § = ¥
Special characters in phone numbers
You can use special characters to dial or save interna-
tional phone numbers as well as phone numbers of
automated services such as bank account informa-
tion. When entering numbers, press the
key
repeatedly to use these characters.
Character
Use
-
This character is used to send command strings to the
network. Contact your service provider for details.
.
This character is a prefix used for dialing international
numbers.
S
Use this character to save phone numbers of automated
services that require you to enter a password or other
information after the call is answered. For example, if
your bank’s phone number is 555-1212 and you need
to enter your account number (12345) and password
(6789), you could save this phone number as
8884545S45678S9:;<
Note: In digital networks, digits to the right of the
S are
sent after a 2.5-second pause. In analog networks,
digits to the right of the
S are not sent until you press
6HQG.
Z
This character creates a wait; digits to the right of the
Z
are not sent until you press
6HQG. Currently this
character cannot be saved.

44
Erasing stored names and numbers
See “Erasing stored names and numbers” on
page 63.
Erasing your entire phone book
See “Erasing your entire phone book” on page 63.
Fax and data calls
Your phone can send and receive data and faxes via
an optional data adapter that connects to the base of
the phone. The phone automatically recognizes the
type of the connected terminal.
Making a fax or data call:
1) Connect the appropriate data or fax terminal to the
phone
If you try to make a data or fax call and the data
adapter is not connected or connected incor-
rectly, the text
3OHDVH#FRQQHFW#WHUPLQDO will appear.
Check that the data adapter is properly set up.
2) Enter or recall phone number from the phone
book
3) End the call by pressing
ô
For more information, refer to documentation supplied with
your data adapter, data application or fax application.
Note: You cannot make a data or fax call while you have active
or held calls in progress.
Fixed dialing
This lets you restrict your outgoing calls to phone
numbers included in the fixed dialing list or beginning
with the same digit(s) as an entry in the list.
Note: Fixed dialing works only with SIM cards that support it.
For other types of call restrictions, see “Restrict calls” on
page 68.

45
Turning fixed dialing on or off
1) Press
#0HQX 4 2 5 (6HWWLQJV#0#6HFXULW\#VHWWLQJV#0#)L[HG#
GLDOLQJ)
(For details on how to work the menu, see page 13)
Use
W
to reach
2Q or 2II then press 2.
2) Enter your PIN2 code and press
2.
Note: If you turn fixed dialing on and don’t have any numbers
in the list, you can’t make any calls!
Note: When fixed dialing is set to on, calls may be possible to
certain emergency numbers in some networks (e.g. 911 or
other official emergency number).
Adding numbers to the fixed dialing list
1) Press
#0HQX 4 2 5 (6HWWLQJV#0#6HFXULW\#VHWWLQJV#0#)L[HG#
GLDOLQJ)
2) Use
W
to reach
1XPEHUV then press 2.
3) Use
W
to reach
$GG then press 6HOHFW
4) Enter your PIN2 code and press
2.
5) Enter the name (optional) and press
2.
6) Enter the number and press
2.
Tip:
If supported by your SIM card, you may be
able to add an entry from your phone book to the
fixed dialing list. When prompted to enter a name,
press the scroll button to access your phone book.
Scroll to the entry you want to add, then press
2..
Repeat steps 3-6 for each number you want to add to
the list.
Forward calls
Call forwarding is a network ser-
vice that lets you forward your
incoming calls to another phone
number. Check with your service
provider for details.
If you have subscribed to a second phone line (see
page 53), call forwarding functions separately for each
line. Make sure you have selected the line you want
before you set up any call forwarding. Icons that
appear on your phone’s screen to indicate that calls
have been forwarded are shown on page 1.

46
Forwarding calls
1) Press
#0HQX 5 ()RUZDUGLQJ)
(For details on how to work the menu, see page 13)
2) Use
ý
W
to reach one of the following options, then
press
6HOHFW:
5 1
)RUZDUG#DOO#YRLFH#FDOOV
(Forwards all voice calls without ringing)
5 2
#)RUZDUG#LI#EXV\
5 3
)RUZDUG#LI#QRW#DQVZHUHG
5 4
#)RUZDUG#ZKHQ#SKRQH#RII#RU#QR#FRYHUDJH
5 5
#)RUZDUG#ZKHQ#QRW#DEOH#WR#WDNH#FDOOV
(Combines the previous three types)
5 6
)RUZDUG#DOO#ID[#FDOOV
5 7
)RUZDUG#DOO#GDWD#FDOOV
3)
$FWLYDWH
is selected;
press
2.
4) At the
1XPEHU= prompt, enter the phone number
to which you want to forward calls and press
2.
You can press
1XPEHU to verify that you entered
the correct number.
Cancelling call forwarding
To cancel call forwarding, press
0HQX 5 8.
Note: Cancelling all call forwarding may also cancel any
automatic forwarding of calls to voice mail that your service
provider has activated for you. Contact your service provider
for details.
Getting call forwarding status
Note: Status is not available for
)RUZDUG#ZKHQ#QRW#DEOH#WR#
WDNH#FDOOV
.
1) Repeat steps 1-2 in “Forwarding calls”
2) Use
W
to reach
6WDWXV and press 2.
Press
1XPEHU to show the phone number to
which the calls are forwarded.
Note: When
)RUZDUG#DOO#YRLFH#FDOOV
is turned on, the
icon
is displayed when the display is clear.

47
Games
Challenge yourself or a friend to the five fun games in
your phone. In the main menu scroll down to
*DPHV,
press
6HOHFW, and choose one of the following.
REMEMBER! Your phone must be switched on to use this
function. Do not switch on the phone when wireless phone
use is prohibited or when it may cause interference or danger.
Memory
Reveal pictures to find pairs in as few tries as possible.
Move the cursor with the 2 (up), 4 (left), 6 (right), and 8
(down) keys. Press the 5 key to reveal pictures. Press
the # key to jump right over revealed pictures or move
from the bottom right of the screen to the top left.
Press the
key to jump left over revealed pictures
or move from the top left of the screen to the bottom
right. Once found, pairs stay visible.
Snake
Feed the snake with as many goodies as possible and
watch it grow. Use keys 2, 4, 6, and 8 to turn the
snake toward food. The longer the snake’s tail grows,
the higher the score. If the snake hits its own tail or the
surrounding wall, the game is over.
Logic
Find the secret combination of figures in a column.
Possible figures are shown at the top of the display.
Press the 5 key repeatedly to select a figure and the 2,
4, and 8 keys to move the cursor. Once you think you
have the right combination, press the
key. The
result appears as a set of marks above the column. A
correct figure in the right place gets a full mark; a correct
figure in the wrong place gets a half mark. The game
ends when the correct figures are in the right place.
#
7LS= To copy a figure from the previous column, move
the cursor over it using the 2, 4, or 8 key, then press
the 5 key.
Dice
This game takes the place of an actual set of dice. Use
the
/HYHO option to set the number of dice, up to six.
You can roll, lock, and unlock each die as many times
as you wish.

48
When you start a new game, the dice roll for a couple
of seconds and then stop. Use the 4 (left) and 6 (right)
keys to select a die. Press the 5 key to lock or unlock
the selected die.
Press
to roll the unlocked dice again.
Rotation
The object of the game is to arrange the numbers in
order from one to nine. Rotate the numbers from
within the frame in a clockwise direction using the 5
key. Use the 1 key to rotate the numbers in a counter-
clockwise direction. To move the frame to another
position, use the 4 and 6 keys (left and right) and the 2
and 8 keys (up and down).
Inbox
When you receive a text message (see page 78), the
text message is stored in the Inbox.
The phone displays
0HVVDJH#UHFHLYHG and the
indicator, and makes a sound (depending on the
“Message alert tone”; see page 54).
Message storage
The Inbox and Outbox share a given amount of
memory in your SIM card. When this memory is full
and there is no more room to store messages, the
message indicator blinks. If you are sent a text
message when the memory is full, the phone displays
the message
1R#VSDFH=#PHVVDJH#ZDLWLQJ. You should
delete one or more old messages to make room for
the new message. The network will wait and re-send
the message at a later time.
Note: Depending on your SIM card, the Inbox and Outbox can
contain a total of up to 50 messages.
Reading messages immediately
If your phone says
0HVVDJH#UHFHLYHG, press 5HDG.
This takes you to the Inbox, with the new message
selected. Press
5HDG again. If necessary, use
W
and
V
to scroll through the message.

49
Reading messages any time
1) Press
0HQX 1 1 1 (0HVVDJHV - 7H[W#PHVVDJHV - ,QER[)
(For details on how to work the menu, see page 13.)
A list of message headers appears.
The
icon in front of the header indicates that a
message has been read. The
icon indicates
that a message has not yet been read.
2) Use
W
to reach the message you want, and press
5HDG
3) If the message is long, use
W
and
V
to scroll
through the message
4) The message text is followed by the sender’s name
or phone number, and reception date and time
When you’ve seen the last message, the
indicator
disappears.
Working with messages in the Inbox
You can access options while you’re reading a mes-
sage. Just press
2SWLRQV, scroll to the one you want,
then press
2..
(UDVH deletes the message. Press 2. to confirm.
5HSO\ sends a reply to the sender of the message.
Enter your message and press
2SWLRQV. Use
W
to reach
6HQG and press 2.. The phone displays the return
number. Edit the number if desired, then press
2..
(GLW allows you to edit a message.
*HW#QXPEHU retrieves an included phone number from
a message, if there is one. You can use it like any other
number. If there is more than one number, scroll to the
desired number, then press
2..
)RUZDUG sends the message to someone else. Edit the
message (if necessary), press
ó
, enter the number
at the
1XPEHU= prompt, then press 2.. Or, edit the
message, then press
2SWLRQV. 6HQG is selected. Press
2.. Enter the recipient’s phone number or recall it from
the phone book and press
2..

50
'HWDLOV shows these details of the message, if avail-
able: sender’s name and phone number, SMS center
used for sending, reception date and time, reply path
availability.
Delivery reports
Delivery reports are special text messages that let you
know the delivery status of a message that you have
attempted to send. (See “Specifying settings for all
messages” on page 56.)
To read a delivery report, press
5HDG. Use the scroll
keys to view different details about the message that
you have attempted to send.
To erase a delivery report, press
5HDG, then press
2SWLRQV. Choose (UDVH to erase the report you are read-
ing, or choose
(UDVH#UHSRUWV to erase all of the delivery
reports that are in your Inbox.
In-call menu
While in a call, press
2SWLRQV to access the in-call
menu. See separate entries for call hold, call waiting,
conference calls, microphone, touch tones, and
transfer a call.
Keyguard
This feature prevents accidental key presses when
your
phone is in your pocket or purse by locking your
keypad. If any keys are pressed while Keyguard is
activated,
3UHVV#8QORFN#DQG#WKHQ#- appears.
Activating Keyguard
Press and hold
ô
until
.H\V#ORFNHG appears,
OR
Press
0HQX
#
OR
Press
0HQX 9

51
Deactivating Keyguard
Press
8QORFN#
#
OR
Press and hold
ô
until
8QORFN#NH\V" appears, then
press
2.
Answering a call with Keyguard active
When Keyguard is active, you can only press
ó
to
answer a call.
Some notes about Keyguard
•
When Keyguard is ON, calls may be possible to the
emergency number programmed into your phone
(e.g. 911 or other official emergency number). However,
one-key emergency dialing (‘the 9 key’) does not operate.
•
Briefly pressing the
key turns lights on for 15
seconds.
•
Keyguard is automatically turned off when the phone is
connected to a car kit.
Keypad tones
This is one of the settings in your phone’s profiles
(see page 65). It sets the volume of the tone that you
hear when you press the phone’s keys.
Setting the keypad tones
1) Press
0HQX#3 (3URILOHV)
(For details on how to work the Menu, see page 13)
2) Use
ýW
to highlight the profile you want to set the
keypad tones for, and press
2SWLRQV
3) Highlight
&XVWRPL]H and press 2.. Press
W
to
.H\SDG#WRQHV and press 6HOHFW.
4) Press
W
to scroll through the options; your phone
plays a sample of each. Press
2. for the one you
want.

52
Language
Because many wireless phone
customers speak English as a
second language, your phone
allows you to choose your phone’s
displayed language.
Choosing a language for your phone
1) Press
0HQX 4 3 1 (6HWWLQJV - 3KRQH#VHWWLQJV -
/DQJXDJH)
(For details on how to work the Menu, see page 13)
2) Use
W
or
V
to select the language you want and
press
2.
Note: A shortcut for choosing English is to press
0HQX
4 3 1 1.
Last call duration
See “Call timers” on page 30.
Last number redial
To redial the last dialed number, press
ó
twice while
at the start screen.
To dial any of the 10 last dialed numbers
Press
ó
, then press
W
to reach the desired number,
and press
ó
again. You can also view this list using
the menu; see “Dialed calls” on page 39.
Lights
To turn your phone’s lights on for 15 seconds, press
any key. If Keyguard is on, press the power key.
If you are using your phone with a handsfree car kit,
you can set lights to
2Q (lights stay on) or $XWRPDWLF
(after 15 seconds, lights turn off until the next key is
pressed, phone rings, etc.). Do this by customizing
your phone’s
&DU profile (see “Profiles” on page 65).

53
Line in use
Alternate line service allows you to have more than one
phone number. Contact your service provider for
details. If you subscribe to this service, you can
choose which phone number you want to make calls
with. You can receive calls on either line regardless of
the line selected for outgoing calls.
Voice mail, call timers, and forwarding calls work sep-
arately on the second phone line. See the individual
entries regarding these features for more information.
Selecting an outgoing line
1) Press
0HQX 4 1 4 (6HWWLQJV - &DOO#VHWWLQJV - /LQH#LQ#XVH)
(For details on how to work the menu, see page 13)
2) Use
ý
W
to reach the line you want, and press
2.
Note: If you switch the phone on with a new SIM card, the
phone chooses Line 1 automatically.
Line numbers on your phone’s screen
When Line 1 is selected for outgoing calls,
appears
on the start screen. When Line 2 is selected for
outgoing calls,
appears on the start screen.
When you receive a call on the line that is not selected
for outgoing calls, that line number flashes on your
phone’s screen. Once you have answered the call, the
number of the outgoing line is displayed again.
List of own numbers
If your SIM card supports this feature, you can view the
phone number(s) of your SIM card.
Viewing own numbers
1) Press
0HQX 4 3 2 (6HWWLQJV - 3KRQH#VHWWLQJV - /LVW#RI#
RZQ#QXPEHUV)
(For details on how to work the menu, see page 13)
2) Use
W
to reach the desired entry (for example, the
name of the service provider and “PCS”)
,

54
Listen to voice messages
See “Voice messages” on page 80.
Logic
See "Games" on page 47.
Memory
See "Games" on page 47.
Menu
See “Working The Menu” on page 13.
Message alert tone
This is one of the settings in your phone’s profiles
(see page 65). It sets the tone that your phone makes
when you get a text message.
Also, see “Text messages” on page 78.
1) Press
0HQX 3 (3URILOHV)
(For details on how to work the Menu, see page 13)
2) Use
ýW
to highlight the profile you want to set the
message alert tone for, and press
2SWLRQV
3) Highlight
&XVWRPL]H and press 2.. Press
W
to
reach
0HVVDJH#DOHUW#WRQH, then press 6HOHFW.
4) Use
W
to scroll through your choices (your phone
plays samples) and press
2.
Message received
Text messaging is a network service that allows you to
send and receive text messages with your phone (see
“Text messages” on page 78). Check with your service
provider for details.
When you receive a text message, the phone displays
0HVVDJH#UHFHLYHG#and the
indicator, and makes a
sound (depending on the “Message alert tone”; see
page 54).

55
To read the message, press
5HDG. This takes you to the
Inbox, with the new message selected. Press
5HDG
again to read the message.
See “Inbox” on page 48 for more details on received
text messages.
Message settings
Text messaging is a network service that allows you to
send and receive text messages with your phone (see
“Text messages” on page 78). Check with your service
provider for details.
You can specify some of the ways your phone handles
text messages. Depending on your SIM card, you can
have up to five “sets” of settings—for example, one for
e-mail messages, one for pages, one for faxes, etc.
Specifying a set of message settings
1) Press
0HQX 1 2 (0HVVDJHV - 0HVVDJH#VHWWLQJV)
(For details on how to work the menu, see page 13)
2) Press
W
to reach the set you want to specify set-
tings for, and press
6HOHFW
3) Press
W
to reach the options listed below and
press
6HOHFW
0HVVDJH#FHQWHU#QXPEHU: Either enter the message
center phone number and press
2., or press
6HDUFK to get the number from your phone book
(if it is stored there).
Your service provider gives you your message center
number. You need it to send text messages.
0HVVDJHV#VHQW#DV: Use
W
to reach
7H[W, )D[, 3DJH or
(0PDLO format, then press 2..
In order to receive a converted message, the recipient
needs to have the appropriate terminal device.
0HVVDJH#YDOLGLW\: Use
W
to reach the amount of
time that messages are stored at the message
center, then press
2..

56
5HQDPH#WKLV#VHW: Enter a new name for this set of
message settings and press
2..
Specifying settings for all messages
1) Press
0HQX 1 2 6 (0HVVDJHV - 0HVVDJH#VHWWLQJV -
&RPPRQ)
(For details on how to work the menu, see page 13)
2) Press
W
to reach
'HOLYHU\#UHSRUWV or 5HSO\#YLD#VDPH#
FHQWHU#and press 6HOHFW
'HOLYHU\#UHSRUWV: Press
W
to reach
<HV or 1R then
press
2.. <HV#means that the network will try to
send delivery reports for the messages you send.
5HSO\#YLD#VDPH#FHQWHU means that the network will
try to route the reply to this text message via your
own message center.
Microphone
You can mute and unmute your phone’s microphone
while a call is in progress. The difference between
mute and hold is that mute allows you to continue to
hear the other person.
To mute the phone’s microphone during a call; press
2SWLRQV, scroll to 0XWH, then press 6HOHFW. To unmute the
microphone, press
8QPXWH.
Note: If you are using the optional analog module,
0XWH
ap-
pears as the right softkey during a call. Press
0XWH
to mute the
microphone and
8QPXWH
to unmute it.
Muting and unmuting also affects the microphones of
any accessories connected to the phone.
Missed calls
Your phone automatically stores the last 10 numbers
that have tried unsuccessfully to reach you. See “Call
log” on page 28 for details on other call lists.

57
When the display says
0LVVHG#FDOOV
Press
/LVW. If you have missed more than one call, you
can scroll through the list of numbers. To dial the dis-
played number, press
ó
; for options, press
2SWLRQV
(see “The ‘Options’ soft key” on page 29); to exit,
press
%DFN.
Viewing the missed calls list at any time
1) Press
0HQX 2 1 (&DOO#ORJ - 0LVVHG#FDOOV)
2) Press
W
or
V
to reach the desired number
3) To dial the number, press
ó
; for other options,
press
2SWLRQV (see “The ‘Options’ soft key” on
page 29)
Erasing the missed calls list
See “Clear call lists” on page 36.
Module call timers
See “Call timers for analog calls” on page 86.
Module security
See “Module security” on page 88.
Names
See “Working The Menu” on page 13 and “Phone
book” on page 61.
News & Info service
This network service allows you to
receive news and information from
the network. Contact your service
provider for details.
Using the News & Information service
1) Press
0HQX 1 4 (0HVVDJHV - 1HZV#)#LQIR#VHUYLFH)
(For details on how to work the menu, see page 13)

58
2) Use
ý
W
to reach one of the following options and
press
2.
2Q - Turns on News & Info reception.
2II - Turns off News & Info reception.
7RSLF#LQGH[ - Gets a list of available topics from the
network.
7RSLFV - Lets you work with the available topics.
See “Working with Topics”.
/DQJXDJH#- Chooses the language for messages.
Scroll to the language(s) you want and press
0DUN
for each one you want. Then press
%DFN, then <HV
to save or
1R to ignore the changes.
Working with topics
Once you’ve chosen
7RSLFV in Step 2 above, you have
the following choices.
6HOHFW
1) Use
W
to scroll through available topics.
2) Press
0DUN to select or 8QPDUN to deselect a
topic. Repeat this as many times as you need.
3) Press
%DFN
4) Press
<HV to save your changes or 1R to ignore the
changes
$GG#QHZ
1) Enter the topic number and press
2..
2) Enter the name and press
2..
(GLW
1) Use
W
to reach the topic you want to edit.
2) Edit the number and press
2.. Repeat this with
the name.
(UDVH
1) Use
W
to reach the topic you want to erase and
press
2..

59
One-touch dialing
This feature allows you to make phone calls quickly
and easily with the touch of a button.
The second through eighth phone numbers you store
to your phone book are automatically assigned to keys
2 through 8. You can change the key assignments
using the following procedure.
Note: Keys 1 and 9 are used exclusively for dialing your voice
mailbox and for attempting emergency calls (See “Voice mes-
sages” on page 80 and “Emergency Calls” on page 99).
Storing one-touch dial locations
At the start screen,
1) Press
1DPHV
2) Press
W
or
V
to highlight 1
0WRXFK#GLDOLQJ
3) Press
6HOHFW
4) Press
W
or
V
to scroll to the desired key
5) Press
$VVLJQ
6) Press
W
or
V
to choose the name you want to
assign to the selected key, then press
2.
Calling a number using one-touch dialing
Press and hold a key (2 through 8) for a few seconds
to call the number in the corresponding one-touch dial
location.Your phone recalls the phone number from
the memory, displays it briefly, then dials it.
Note: If you press and hold 1, your phone calls your voice mail-
box. If you press and hold 9 and Emergency Key 9 is on, your
phone attempts a call to the emergency number programmed
into your phone.
Changing numbers in one-touch dial list
With this feature, you can assign a different number to
any one-touch dial location.
At the start screen,
1) Repeat steps 1 through 3 in “Storing one-touch
dial locations”

60
2) Press
W
or
V
to select location you wish to
change
3) Press
2SWLRQV
4) Press
W
or
V
to
&KDQJH, then press 6HOHFW
5) Press
W
or
V
to select different name for location
and press
2.
Erasing one-touch dial locations
1) Repeat steps 1 through 3 in “Storing one-touch
dial locations”
2) Press
W
or
V
to select location you wish to erase
3) Press
2SWLRQV
4) Press
W
or
V
to
(UDVH, then press 6HOHFW
5) At the
(UDVH" prompt, press 2.
Outbox
Text messages that you have written and saved are
stored in the Outbox. The
icon in front of a mes-
sage heading shows that you have attempted to send
the message to the text message center. The
icon
shows that you have not yet tried to send the
message.
Using the Outbox
1) Press
0HQX 1 1 2 (0HVVDJHV - 7H[W#PHVVDJHV - 2XWER[)
2) Use
ý
W
to scroll through the message headers.
Press
5HDG to read the selected message.
Working with messages in the Outbox
While reading a message, press
2SWLRQV to work with
messages. Scroll to one of the following options:
(UDVH deletes the message. Press 2. to confirm the
erase or
%DFN to exit.
(GLW allows you to edit the message. Use &OHDU to back-
space over letters,
W
or
V
to move the cursor, and the

61
number keys to enter letters. (See “Entering Letters”
on page 42 for details.) When you’re done, press
2SWLRQV again. You get the same options you get while
writing a new message (
6HQG, 6HQG#VSHFLDO, 6DYH, and
&OHDU#VFUHHQ). See “Write messages” on page 82.
*HW#QXPEHU displays the number that was included in
the message (if available). You can treat it like any other
number.
)RUZDUG forwards the message to someone else. The
steps are the same as sending a message. See “Write
messages”, Send option, on page 83.
Phone book
Depending on your SIM card, you can store up to 250
numbers (and associated names) in the phone book.
Actual number is dependent on SIM Card capacity.
Please check with your SIM Card provider or carrier.
(See “Checking available memory” on page 63.) These
numbers are right at your fingertips for easy dialing.
To access them, simply press
W
or
V
from the start
screen.
Things to know about the phone book
•
The maximum length of stored numbers and names
depends on your SIM card.
•
A name may appear only once in memory. If you try to
store a name that already exists in memory, the phone
will ask if you want to replace the currently stored name.
Accessing names in the phone book
At the start screen, press
W
or
V
. To skip ahead
quickly in the list, press the number key that corre-
sponds to the first letter of the name. Press
ó
to call
the number.
Accessing phone book functions
At the start screen,
1) Press
1DPHV
2) Press
W
or
V
to highlight desired submenu
3) Press
6HOHFW

62
About the submenus
The phone book has several submenus from which
you can choose.
6HDUFK allows you to search for a specific name.
$GG#QHZ allows you to enter new names and numbers.
(UDVH#DOO lets you erase every name and number in your
phone book. You can erase one name and number at
a time by pressing
'HWDLOV, then 2SWLRQV when viewing
a name already in the directory.
2SWLRQV lets you choose your scrolling view (1DPH#OLVW,
1DPH.QXPEHU, or 1DPH#RQO\), as well as check how
many more names your phone can store (see “Check-
ing available memory” on page 63).
1
0WRXFK#GLDOLQJ allows you to assign up to seven one-
touch dial locations (see page 59 for details).
&DOOHU#JURXSV allows you to rename or change the ring-
ing tone for a caller group (see “Caller groups” on
page 32).
Storing a name and number
1) Press
1DPHV
2) Scroll to
$GG#QHZ and press
6HOHFW
3) Enter name using the keypad (use # to switch
between upper and lower case) and press
2.
4) Enter phone number and press
2.
If your phone book is full, you will be given the option
to replace an existing entry.
Also, see “Entering letters and numbers” on page 42
and “Saving names and numbers” on page 72.
Changing a stored number or name
1) Recall stored name
2) Press
2SWLRQV, then select (GLW

63
3) Edit the name, if desired, then press
2.
4) Edit the number, if desired, then press
2.
Erasing stored names and numbers
At the start screen,
1) Recall stored name
2) Press
2SWLRQV
3) Highlight
(UDVH, then press 6HOHFW, then 2.
Note: You cannot undo Erase functions so be careful!
Erasing your entire phone book
1) Press
1DPHV
2) Press
W
to highlight
(UDVH#DOO
3) Press
6HOHFW
4) Press
2. at $UH#\RX#VXUH"
5) Enter security code at
6HFXULW\#FRGH=
6) Press
2.
Warning: This feature will erase your entire phone
book, which cannot be undone!
Checking available memory
1) Press
1DPHV
2) Press
W
or
V
to reach
2SWLRQV, then press 6HOHFW
3) Press
W
or
V
to reach
0HPRU\#VWDWXV, then press
6HOHFW
Your phone will tell you how many memory locations
are free and how many are being used. (One number
and associated name is stored in each memory
location.)
Phone security
You can set the phone to require the security code
when you switch on the phone after installing a new
SIM card.

64
Setting phone security
1) Press
0HQX 4 2 (6HWWLQJV#0#6HFXULW\#VHWWLQJV)
2) Press
W
to reach
3KRQH#VHFXULW\ then press 6HOHFW
3) Enter your security code and press
2.
4) Use
ý
W
to reach
2II or 2Q, and press 2.
2II means that the security code is not required
when the phone is switched on.
2Q#means that the when you switch on the phone
and you’re using a new SIM card, the phone will
require you to enter the security code.
Phone settings
Menu 4 3 in your phone lets you choose settings for
the following items (each entry is described separately
in this guide):
•
/DQJXDJH
of the menus and display
•
/LVW#RI#RZQ#QXPEHUV
(your own phone numbers, if more
than one, that your SIM card can use)
•
&ORFN
(set the time and time format, hide the clock)
•
$ODUP#FORFN
(set alarm time)
•
6\VWHP#VHOHFWLRQ
(how your phone chooses a network to
use if more than one is available)
•
7RXFK#WRQH#OHQJWK
(short or long)
•
(PHUJHQF\#NH\#<
(on or off)
PIN and PIN2 codes
The PIN (Personal Identity Number) code is a 4- to 8-
digit number usually supplied with the SIM card given
to you by your service provider. If you use “SIM card
security” (see page 76), the phone will require you to
enter the PIN code every time you switch on the
phone.
When the phone requires the PIN or PIN2 code, it dis-
plays
(QWHU#3,1#FRGH= or (QWHU#3,15#FRGH=. Enter the code
then press
2.
65
If you enter a wrong PIN code three times in succes-
sion, enter the PUK code (see “PUK and PUK2 codes”
on page 66) and press
2.. Enter a new PIN code and
press
2.. Re-enter the new code and press 2..
The PIN2 code is a 4- to 8-digit number and is sup-
plied with some SIM cards. It is required to access
some functions. These functions must be supported
by your SIM card.
If you enter a wrong PIN2 code three times in succes-
sion, follow the same instructions as for the PIN code
but this time using the PUK2 code.
See “Access Codes” on page 18 for information on
how to change either of these codes.
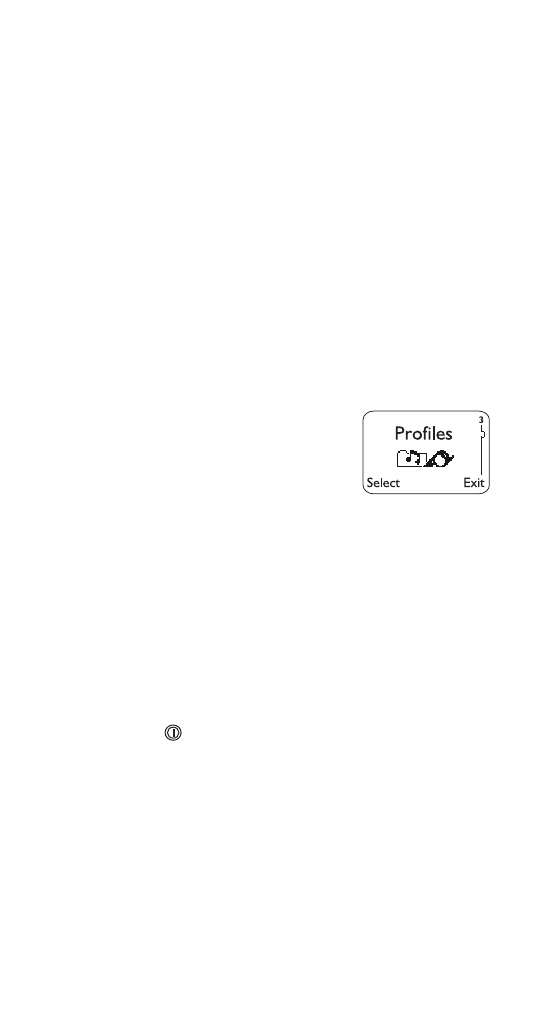
Profiles
You can adjust and customize your
phone to whatever environments
you find yourself in (i.e. meetings, a
movie, etc.). With profiles, you can
control your phone’s lights, ringing
volume, ringing tone, message alert, keypad tones,
warning tones, etc. in a matter of seconds.
Note: The default setting is
1RUPDO
.
Accessing profiles
At the start screen, press
0HQX 3
Selecting different profiles
If you want to change your phone’s profile, briefly
press the
key. Then press
W
or
V
to choose another
profile and press
2.. This allows you to select other
profiles, but not customize them.
Note: When you connect your phone to a headset or a
handsfree car kit, the phone automatically selects the
+HDGVHW
or
&DU
profile. You cannot choose a different profile while these
accessories are connected.

66
Customizing profiles
1) Press
0HQX 3 (3URILOHV)
(For details on how to work the Menu, see page 13)
2) Press
W
or
V
to reach the desired profile
3) Press
2SWLRQV to see the following choices:
6HOHFW activates the currently selected profile.
&XVWRPL]H allows you to customize a profile by
changing the current settings. (If you choose
&XV0
WRPL]H, you’ll have access to several lists and sub-
menus that will enable you to adjust the settings on
the current profile. When you change a setting in
the current profile, it only affects that preset menu
and will not change your phone’s normal settings.)
5HQDPH allows you to rename any profile except
the Normal profile.
4) Press
W
or
V
to reach the desired item
5) Press
2.. If you wish to go back to the main
menu, press
%DFN.
Renaming profiles
1) Press
0HQX 3 (3URILOHV)
(For details on how to work the Menu, see page 13)
2)
W
or
V
until desired profile is highlighted
Note: You cannot rename the Normal profile.
3) Press
2SWLRQV
4)
W
or
V
to
5HQDPH
5) Press
2.
6) Enter new name and press
2.
PUK and PUK2 codes
The PUK (Personal Unblocking Key) may be supplied
with the SIM card. If not, contact your service provider
for the code. The code is required to change a blocked
PIN code.

67
If you enter a wrong PUK code ten times in succes-
sion, the SIM card becomes invalid. Contact your
service provider for a new card.
The PUK2 code, supplied with some SIM cards, is
required to change a blocked PIN2 code. If you enter
a wrong code ten times in succession, you can’t use
the functions requiring the PIN2 code. Contact your
service provider for a new card.
You can’t change the PUK or PUK2 code. If you lose
it, contact your service provider.
Read messages
See “Inbox” on page 48.
Recalling saved names and numbers
With a clear display, press
W
to begin scrolling through
stored names and numbers. See “Phone book” on
page 61 for a description of the
'HWDLOV key.
Received calls
Your phone automatically stores the phone numbers
of the 10 most recent calls you’ve answered. See “Call
log” on page 28 for details on other call lists.
Viewing the received calls list
1) Press
0HQX#2 2 (&DOO#ORJ - 5HFHLYHG#FDOOV)
2) Press
W
or
V
to reach the desired number
3) To dial the number, press
ó
; for other options,
press
2SWLRQV (see “The ‘Options’ soft key” on
page 29)
Erasing the received calls list
See “Clear call lists” on page 36.
Recharge battery
See “Charging your new battery” on page 7.

68
Restrict calls
This is a network service that lets you restrict the calls
your phone can make and receive. Check with your
service provider for details.
Note: When calls are restricted, calls may be possible to cer-
tain emergency numbers in some networks (e.g. 911 or other
official emergency number).
Restricting calls
1) Press
0HQX 4 2 4 (6HWWLQJV - 6HFXULW\#VHWWLQJV -
5HVWULFW#FDOOV)
2) Use
ý
W
to scroll through the types of calls you can
restrict, and press
6HOHFW when you see the one
you want:
2XWJRLQJ#FDOOV: Calls cannot be made.
,QWHUQDWLRQDO#FDOOV: Calls cannot be made to foreign
countries.
,QWHUQDWLRQDO#H[FHSW#WR#KRPH#FRXQWU\: When abroad,
calls can be made only within the current country and
to your home country, i.e. the country where your
home network operator is located.
,QFRPLQJ#FDOOV: Calls cannot be received.
,QFRPLQJ#FDOOV#LI#URDPLQJ: Calls cannot be received out-
side your home area.
&DQFHO#DOO#FDOO#UHVWULFWLRQV: Turns off all call restrictions.
Calls can be made and received in a normal way.
Note: If you selected
&DQFHO#DOO#FDOO#UHVWULFWLRQV
, the steps
which follow will not be available.
3) Use
W
or
V
to reach one of the following options,
and press
2.:
$FWLYDWH: The phone will ask you to enter the
System password. Enter it and press
2..
&DQFHO: The phone will ask you to enter the System
password. Enter it and press
2..
6WDWXV: The phone will list the call types for which
the call restriction is active. Use
W
or
V
to scroll
through the list.

69
For more information about your system password, see
“System password” on page 77.
Ringing options
This is one of the settings in your phone’s profiles (see
page 65). You can choose how your phone notifies
you of an incoming call. This setting does not affect
incoming text message alert tones (see page 78).
Selecting ringing options
1) Press
0HQX 3 (3URILOHV)
(For details on how to work the Menu, see page 13)
2) Use
ýW
to highlight the profile you want to set the
ringing options for, and press
2SWLRQV
3) Highlight
&XVWRPL]H and press 2.. Press
W
to
5LQJLQJ#RSWLRQV, then press 6HOHFW.
4) Highlight your choice (described on next page)
and press
2.
5LQJ: The phone rings.
,QFUHDVLQJ: The ringing volume starts low and
increases with successive rings.
5LQJ#RQFH: The phone rings once.
%HHS#RQFH:#The phone gives a short beep.
&DOOHU#JURXSV: Sets the phone to “Silent” except for
calls from people in selected caller groups (see
“Caller grouping” on page 33). Press
W
to high-
light the desired group(s) and press
0DUN to select
or
8QPDUN to de-select them.
Press
%DFN and then <HV to save or 1R to ignore the
changes. If you have any caller groups marked,
the phone does not ring unless the call is from a
person who belongs to the selected group(s).
6LOHQW: The phone sounds no tone.
When
6LOHQW is selected and keypad tones, warning
tones and message alert tone are turned off,
the
icon is shown when the display is clear.

70
Note: The call alert setting is stored individually for operation
with a handsfree headset and a handsfree car kit.
Ringing tone received
Your phone can receive ringing tones that can be
saved as the
3HUVRQDO entry in your list of ringing tones.
Contact your service provider for details about send-
ing ringing tones to your phone.
When your phone receives a ringing tone, it displays
5LQJLQJ#WRQH#UHFHLYHG.
Listening to received ringing tones
Caution: If you press
([LW at any time before saving the
ringing tone, the ringing tone will be deleted!
1) When your phone displays
5LQJLQJ#WRQH#UHFHLYHG,
press
2SWLRQV
2)
3OD\EDFN is selected. Press 2.. The phone plays
the ringing tone.
Saving received ringing tones
1) After listening to the ringing tone, press
%DFN
2) Use
W
to reach
6DYH WRQH and press 2.
The tone is saved to the
3HUVRQDO entry in your list
of ringing tones.
Deleting received ringing tones
After listening to the ringing tone, press
%DFN, then
press
([LW.
Ringing tones
You can assign ringing tones to profiles (see page 65)
and to caller groups. This entry describes how to set
ringing tones for profiles. For information on setting
tones for caller groups, see “Defining a ringing tone for
a caller group” on page 32.
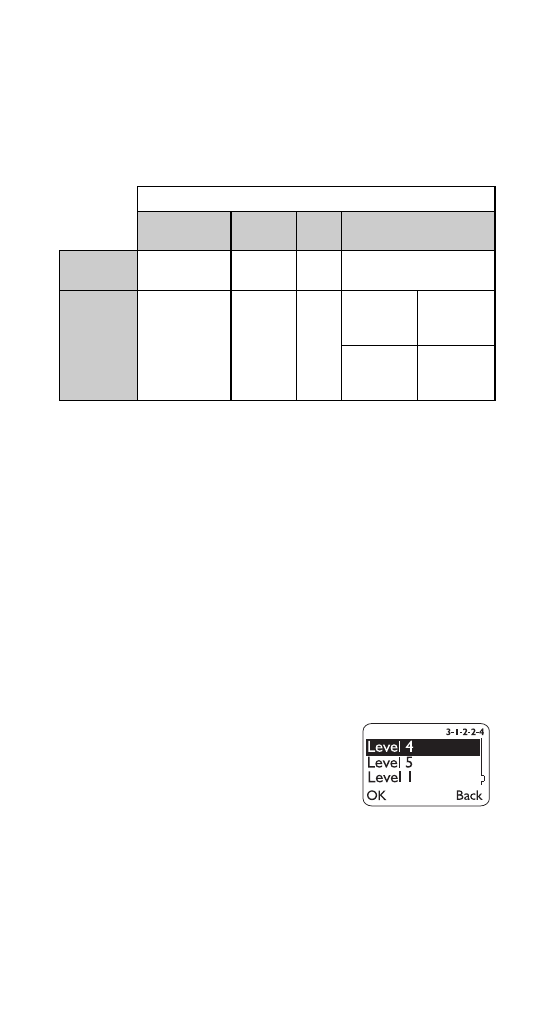
71
As outlined in the table below, the sound your phone
makes when you receive a call depends on the ringing
option for the currently selected profile, whether the
caller is assigned to a caller group, and, if the
&DOOHU#
JURXSV ringing option is selected, which caller group
the caller belongs to.
Selecting ringing tones
1) Press
0HQX 3 (3URILOHV)
(For details on how to work the Menu, see page 13)
2) Use
ýW
to highlight the profile you want to set the
ringing tones for, and press
2SWLRQV
3) Highlight
&XVWRPL]H and press 2.. Press
W
to
5LQJLQJ#WRQH, then press 6HOHFW.
4) Press
W
to scroll through the options. After you
hear the tone you wish to use, press
2..
Ringing volume
This is one of the settings in your
phone’s profiles (see page 65). It
sets the default ringing volume for
incoming voice calls and message
alert tones.
Setting the ringing volume
1) Press
0HQX 3 (3URILOHV)
(For details on how to work the Menu, see page 13)
Ringing option for currently selected profile (see page 69)
Ring/Increasing/
Ring once
Beep once
Silent
Caller groups
Caller is not in
a caller group
Profile ringing
tone
Beep
No
sound
No sound
Caller is in a
caller group
Caller group
ringing tone
Beep
No
sound
Caller is in a
marked caller
group
Caller group
ringing tone
Caller is in an
unmarked
caller group
No sound

72
2) Use
ýW
to highlight the profile you want to set the
ringing volume for, and press
2SWLRQV
3) Highlight
&XVWRPL]H and press 2.. Press
W
to
5LQJLQJ#YROXPH, then press 6HOHFW.
4) Press
W
to scroll through the options. When you
hear the volume level you wish to use, press
2..
Saving names and numbers
You can save names and numbers in the Phone book.
Either use the method described in “Phone book”
under the option
$GG#QHZ (see “About the submenus”
on page 62), or the “quick save” methods described
below. If your phone book is full, you will be given the
option to replace an existing entry.
Quick save of name and number
At the start screen,
1) Enter the phone number and press
6DYH
2) The phone prompts you to enter a
1DPH=. Enter a
name if you wish (optional), then press
2..
For details on entering names, see “Entering letters”
on page 42.
Quick save of number only
To save a number quickly, enter the phone number,
then press and hold
6DYH. The number is saved to your
phone book and you can add a name to it later.
Security code
The security code is required by some security fea-
tures including “Phone security” (see page 63).
When the phone requires the security code, it displays
6HFXULW\#FRGH:. Enter the code then press 2..
If you enter an incorrect security code five times in a
row, the phone will not accept the correct code for the
next five minutes.

73
This code comes with your phone. The default security
code is 12345. For information on how to change the
security code, see “Access codes” on page 18. Keep
the code secret and in a safe place, separate from the
phone.
Security settings
Menu 4 2 in your phone lets you choose settings for
the following items (each entry is described separately
in this guide):
•
6,0#FDUG#VHFXULW\
•
3KRQH#VHFXULW\
•
0RGXOH#VHFXULW\
(appears only if optional analog module
attached)
•
5HVWULFW#FDOOV
•
)L[HG#GLDOLQJ
•
&DOO#FRVW#OLPLW
•
$FFHVV#FRGHV
The following table provides a summary of how dif-
ferent types of security codes are used in your phone.
Code
Purpose
For more information
Security code
Required by several phone features. If
phone security is on, the phone
requests the security code the first
time you use it after installing a new
SIM card.
See entries for call timers,
calling card, phone book,
and phone security.
PIN code
If SIM card security is on, the phone
requests the PIN code every time the
phone is turned on.
See “SIM card security” on
page 76.
PIN2 code
Required by several phone features.
See entries for show call
costs, call cost limit, fixed
dialing, and PIN and PIN2
codes.
System password
Required by the Restrict Calls feature. See “Restrict calls” on
page 68.
Module code (used
with optional analog
module only)
If module security is on, the phone
requests the module code when the
phone is turned on, the optional analog
module is attached, and either (a) the
module code has not been changed
from the default of 12345, or (b) the
module code has been changed but it
is different from the security code.
See “Module security” on
page 57.

74
Send own number
This is a network service that specifies whether or not
you wish to display your phone number to the person
you are calling. Contact your service provider for
details.
Note: This feature is only effective when calling to a number
that is equipped with Caller ID.
1) Press
0HQX 4 1 3 (6HWWLQJV - &DOO#VHWWLQJV - 6HQG#RZQ#
QXPEHU)
(For details on how to work the Menu, see page 13)
2) Press
W
to reach
3UHVHW (to use the default net-
work setting),
2Q (to show your number), or 2II
(to not show it) and press
2.
Note: These menu items may vary by SIM card
and service provider.
If you don’t make a selection, your phone uses the
default network setting. Check with your service pro-
vider to find out the network default.
Service command editor
Note: This feature is not supported over analog networks.
You can use this feature to activate network services
remotely by using numeric commands that you get
from your service provider.
Sending commands
1) Press
0HQX 1 5 (0HVVDJHV#0#6HUYLFH#FRPPDQG#HGLWRU)
2) Enter the service command, including numbers
3) Press
6HQG
Settings
Menu 4 in your phone lets you
choose settings for your phone.
It consists of the following areas,
which are described under their
own headings:

75
•
&DOO#VHWWLQJV
•
6HFXULW\#VHWWLQJV
•
3KRQH#VHWWLQJV
•
$QDORJ#PRGXOH#VHWWLQJV
(appears only when optional
analog module attached)
Show call costs
This network service allows you to check the cost of
the last or current call, or the total cost of all calls that
you have made or received since the counters were
last reset. Contact your service provider for details.
To choose whether call costs are shown in charging units or in
dollars, see “Show costs in”.
Note: This feature is not supported in analog mode (using the
optional analog module).
Show call costs
1) Press
0HQX 2 6 (&DOO#ORJ - 6KRZ#FDOO#FRVWV)
2) Press
ý
W
ýto see /DVW#FDOO#FRVW (cost of last call, or
current call if applicable) or
$OO#FDOOV#FRVW (cost of all
calls since counters were last reset)
Clear call cost counters
1) Press
0HQX 2 6 (&DOO#ORJ - 6KRZ#FDOO#FRVWV)
2) Press
W
to reach
&OHDU#FRXQWHUV. This#resets all
cost counters. (You will be prompted to enter the
PIN2 code to do this.)
Caution: The clear counters command cannot be undone.
Note: The actual invoice for calls and services from your ser-
vice provider may vary, depending upon network features,
taxes and so forth.
Show costs in
This feature allows you to choose whether you want to
show call costs and set call cost limits in charging
units or in dollars.
Note: This feature appears only if supported by your operator
and SIM card.

76
1) Press
0HQX 2 7 (&DOO#ORJ - 6KRZ#FRVWV#LQ)
2) Press
W
or
V
to reach
&XUUHQF\ or 8QLWV, then
press
6HOHFW
3) If you selected
&XUUHQF\, enter the price of each
charging unit (contact your network operator for
this information) and press
2.. If you chose 8QLWV,
call costs and call cost limits will be measured in
charging units.
SIM card security
You can set the phone to require you to enter the PIN
code every time you switch on the phone. Note that
some SIM cards do not allow this feature to be turned
off.
1) Press
0HQX 4 2 1 (6HWWLQJV - 6HFXULW\#VHWWLQJV - 6,0#
FDUG#VHFXULW\)
2) At the prompt, enter your PIN code and press
2.
3) Press
ý
W
ýto reach 2Q#or#2II.#Press 2..
SIM services
Your wireless service provider may provide additional
services that are available in Menu 10 of your phone.
Menu 10 appears only if supported by your service
provider and SIM card. The name and contents of this
menu depend entirely on the services available.
Any questions about service availability, rates, and
instructions must be directed to the company that sold
you your SIM card.
You can set the phone to display confirmation
messages sent between your phone and the network
when you are using SIM services by pressing
0HQX 4 3 7 (6HWWLQJV - 3KRQH#VHWWLQJV - 1RWLILFDWLRQV#RQ#
6,0#XSGDWH), and choosing 6KRZQ.
Note: Accessing these services may involve sending a text
message (SMS) or making a phone call, for which you may be
charged.

77
Snake
See "Games" on page 47.
Start screen
See “What is the ‘start screen’?” on page 14.
System password
This is a password you get from your service provider.
You need it to activate Call Restrictions. (See “Restrict
calls” on page 68.)
Contact your service provider for details.
System selection
This menu specifies how the phone should choose a
PCS system (network), as there may be more than one
available. The selection you make stays active until
you change it or change the SIM card.
1) Press
0HQX 4 3 5 (6HWWLQJV - 3KRQH#VHWWLQJV - 6\VWHP#
VHOHFWLRQ)
2) Press
ý
W
ýto highlight $XWRPDWLF#or#0DQXDO.#Press
6HOHFW.
In
$XWRPDWLF, the phone automatically selects one of
the available systems. The phone beeps when it
switches to another system.
In
0DQXDO, the phone searches for available systems
then lists them. Use
W
to highlight the one you want
and press
6HOHFW. The phone then requests registration,
and displays the result. If you lose connection while in
Manual mode, the phone prompts you to select a
system again.
For information on analog system selection, see
“Analog system selection” on page 85.

78
Text messages
The text message network service allows you to send
short text messages to other phones that have text
message capability. You can also ask the service pro-
vider to convert the message to other formats such as
email and fax. The messages are first sent to your
Message Center, then delivered to the recipient.
To send and receive text messages, the phone needs
your message center number. See “Message settings”
on page 55.
See these related topics
•
“Inbox” on page 48 for information on received
messages.
•
“Outbox” on page 60 and “Write messages” on page 82
for information on writing and sending.
Touch tone length
This feature allows you to set the length of touch
tones.
Setting touch tone length
1) Press
0HQX 4 3 6 (6HWWLQJV#0#3KRQH#VHWWLQJV#0#7RXFK#
WRQH#OHQJWK)
2) Press
W
or
V
to reach
6KRUW (sets the tone length to
100 ms.) or
/RQJ (sets the tone length to 500 ms.)
3) Press
2.
Touch tones
Your phone can generate various sounds, called touch
tones, when the keys are pressed.
Touch tones can be used for many automated, over-
the-phone services such as voice mail, calling cards,
and checking airline arrival/departure times and bank
balances. Touch tones can be sent only when a call is
active.

79
Storing touch tone strings
Touch tone strings can be used for sending and
receiving information with your phone. For example,
you can store your office voice mailbox number along
with your password for easy access to your
messages.
Store touch tone strings the same way you store
phone numbers (see page 62).
You can store a whole digit sequence in your phone
book and send it as touch tones for frequently used
strings of numbers.
Sending a touch tone string
During a call,
1) Press
2SWLRQV
2) Scroll to
7RXFK#WRQHV and press 2.
3) Enter touch tone string or recall string from the
phone book and press
2.
Note: Use caution when sending confidential information over
the air when using touch tones in analog mode.
Storing touch tone strings with phone
numbers
1) Enter the phone number (for example, your office
voice mailbox)
2) Press
three times (“
S” appears)
Note: See “Special characters in phone numbers” on
page 43.
3) Enter the touch tone string (for example, voice
mailbox password)
4) Store the number as you normally would
When you dial this number, your phone first dials the
phone number, waits 2.5 seconds (because of the “
S”
character), then sends the rest of the touch tone
string.

80
Transfer a call
If your network and SIM card support this feature,
when you have one active and one held call, you can
connect the two calls and disconnect yourself from the
call.
During a call, press
2SWLRQV, scroll to 7UDQVIHU, and press
6HOHFW.
Vibrating alert
This is one of the settings in your phone’s profiles
(see page 65). If your phone has the BMS-2V vibrating
battery attached, you can set your phone to vibrate
when you receive a voice call.
Activating vibrating alert
1) Press
0HQX 3 (3URILOHV)
(For details on how to work the Menu, see page 13)
2) Press
ýW
to highlight the profile you want to set the
vibrating alert for, and press
2SWLRQV
3) Highlight
&XVWRPL]H and press 2.. Press
W
to
reach
9LEUDWLQJ#DOHUW, then press 6HOHFW.
4) Use
Wý
to highlight
2Q or 2II and press 2.. If you
choose
2Q, your phone will vibrate even if you
have set
5LQJLQJ#RSWLRQV (see page 69) to 6LOHQW.
Note: The vibrating battery does not vibrate when the phone
is connected to or placed in any charging device.
Voice mailbox number
This number dials your voice mailbox. See “Voice mes-
sages” in the next section.
Voice messages
Voice mail is a network service that may require a
subscription from your service provider.
Your phone will notify you when you receive a voice
message.
1HZ#YRLFH#PHVVDJH will appear on the display
along with the
icon, and you’ll hear a short beep.

81
Your phone will display the number of voice messages
if you’ve received more than one. If you have sub-
scribed to a second phone line (see “Line in use” on
page 53), the phone tells you which line the message
was intended for.
Setting up your voice mailbox
Before you can retrieve any voice messages, you need
to store your voice mailbox number. Your service
provider usually gives this number to you.
When you’re ready to store your voice mailbox num-
ber, press
0HQX 1 3 2 (0HVVDJHV#0#9RLFH#PHVVDJHV#0#9RLFH#
PDLOER[#QXPEHU). Then enter your voice mailbox phone
number and press
2.. This number can be up to 32
digits long and is used until you change it. If your
phone number changes, you may need to change
your voice mailbox number along with it.
If you have subscribed to a second phone line
(see “Line in use” on page 53) and have a voice-mail
subscription for both lines, you will need to save each
voice mailbox number separately. Select Line 1 as
outlined on page 53, then save the voice mailbox
number for Line 1 according to the preceding instruc-
tions. Next, select Line 2 as outlined on page 53, then
save the voice mailbox number for Line 2 according to
the preceding instructions.
Greetings, passwords, and prompts
These may vary in different wireless systems. If you
need information about how to record your greeting,
delete voice messages, change your password, etc.,
contact your service provider.
Listening to your voice messages
If
1HZ#YRLFH#PHVVDJH is displayed, just press /LVWHQ and
follow the instructions. If you’d rather listen to your
messages later, press
([LW.

82
To listen to messages anytime, press and hold the
1 key. Or if you prefer, you can access your voice mail-
box by pressing
0HQX 1 3 1 (0HVVDJHV#0#9RLFH#PHVVDJHV#0#
/LVWHQ#WR#YRLFH#PHVVDJHV).
Volume
See the separate entries for Earpiece volume, Keypad
tones, and Ringing volume.
Warning and game tones
This is one of the settings in your phone’s profiles (see
page 65). Warning tones include tones your phone
makes for conditions such as errors, confirmations,
power on, battery low, and recharge battery. Game
tones are tones that sound while you are playing one
of the phone’s games. You can turn warning and game
tones on or off.
Turning warning and game tones on or off
1) Press
0HQX 3 (3URILOHV)
(For details on how to work the Menu, see page 13.)
2) Use
ýW
to highlight the profile you want to set the
warning tones for, and press
2SWLRQV
3) Highlight
&XVWRPL]H and press 2.. Press
W
to
:DUQLQJ#WRQHV, then press 6HOHFW.
4) Use
Wý
to highlight
2Q#or 2II and press 2.
Write messages
You can write text messages (see
“Text messages” on page 78) then
send them. It is a good idea to
save your written messages in the
Outbox in case there is a message
delivery problem (see “Outbox” on page 60).

83
Writing a message
1) Press
0HQX 1 1 3 (0HVVDJHV - 7H[W#PHVVDJHV - :ULWH#
PHVVDJHV)
(For details on how to work the Menu, see page 13)
2) Enter a message of up to 160 characters. The
number of available characters is shown in the
top right corner of the display. For details on
entering letters, see “Entering letters” on page 42.
Note: You can exit the message any time (by
pressing
ô
) and return to it later by pressing
Menu 1 1 3 (
0HVVDJHV - 7H[W#PHVVDJHV - :ULWH#
PHVVDJHV). However, if you turn off the phone
without saving the message, it will be lost.
3) Once you are finished writing, press
2SWLRQV, press
W
to reach the desired function and press
2.:
6HQG sends the message. Enter or recall the
recipient’s phone number (or enter e-mail
address, if applicable) and press
2..
6HQG#VSHFLDO allows you to send a message using
an alternate message setting (see “Message set-
tings” on page 55). You choose a setting to use,
then specify whether you want to enter a phone
number (
1XPHULF) or a routing address (7H[W2
QXPEHUV). The phone will prompt you for the
number or routing address.
Note: If you choose to send the message by e-mail, the
phone prompts you for the e-mail address and number if
you choose
1XPHULF
or the e-mail address and routing
address if you choose
7H[W2QXPEHUV
.
A routing address may be required when sending
messages via fax, page, or e-mail. For help using
this feature, contact your service provider.
6DYH stores the message in the Outbox.
&OHDU#VFUHHQ deletes all characters from the message.
You can check whether messages have been
delivered to the text message center by using the
Delivery Reports feature (see “Specifying settings for
all messages” on page 56).
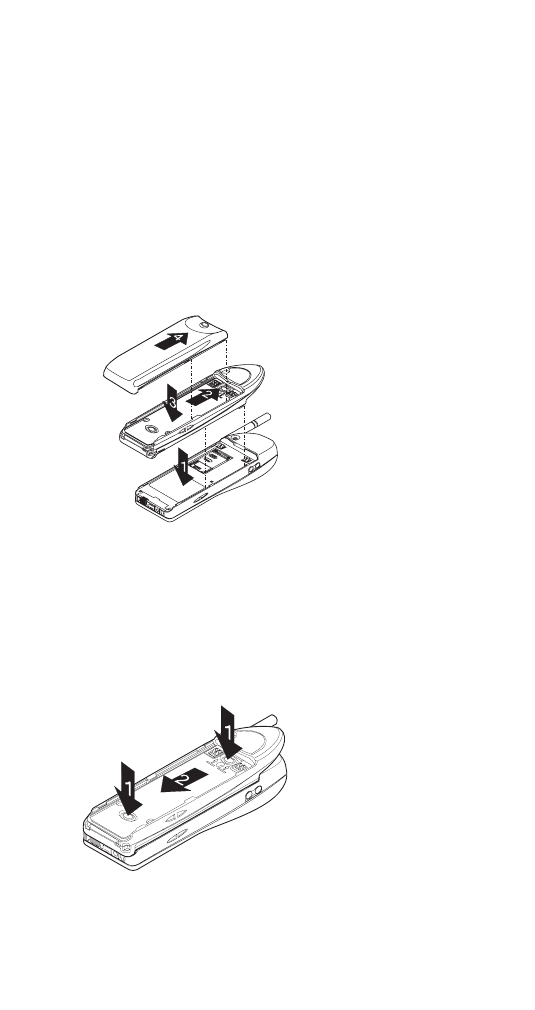
84